here's what it looks like mounted to the PCB, there is a guy here in the US selling the little boards (empty) for 3 dollars each and said he has quite a few of them. the bus bar will be drilled and tapped, and the pcb held in place with nylon bolts. the great thing about this current sensor is that it can be adapted to measure virtually any current. it has a voltage output range of ~4.5 volts, which can be either 0+/-2.25 or 2.5+/-2.25, depending on how it's wired. current range calibration is handled by mounting it closer or farther from the bus bar (such as using a thicker or thinner PCB) and is also affected by the size of the bar (a wider bar seems to be less sensitive, and a narrower bar should be more sensitive.) Final calibration can be handled with software.

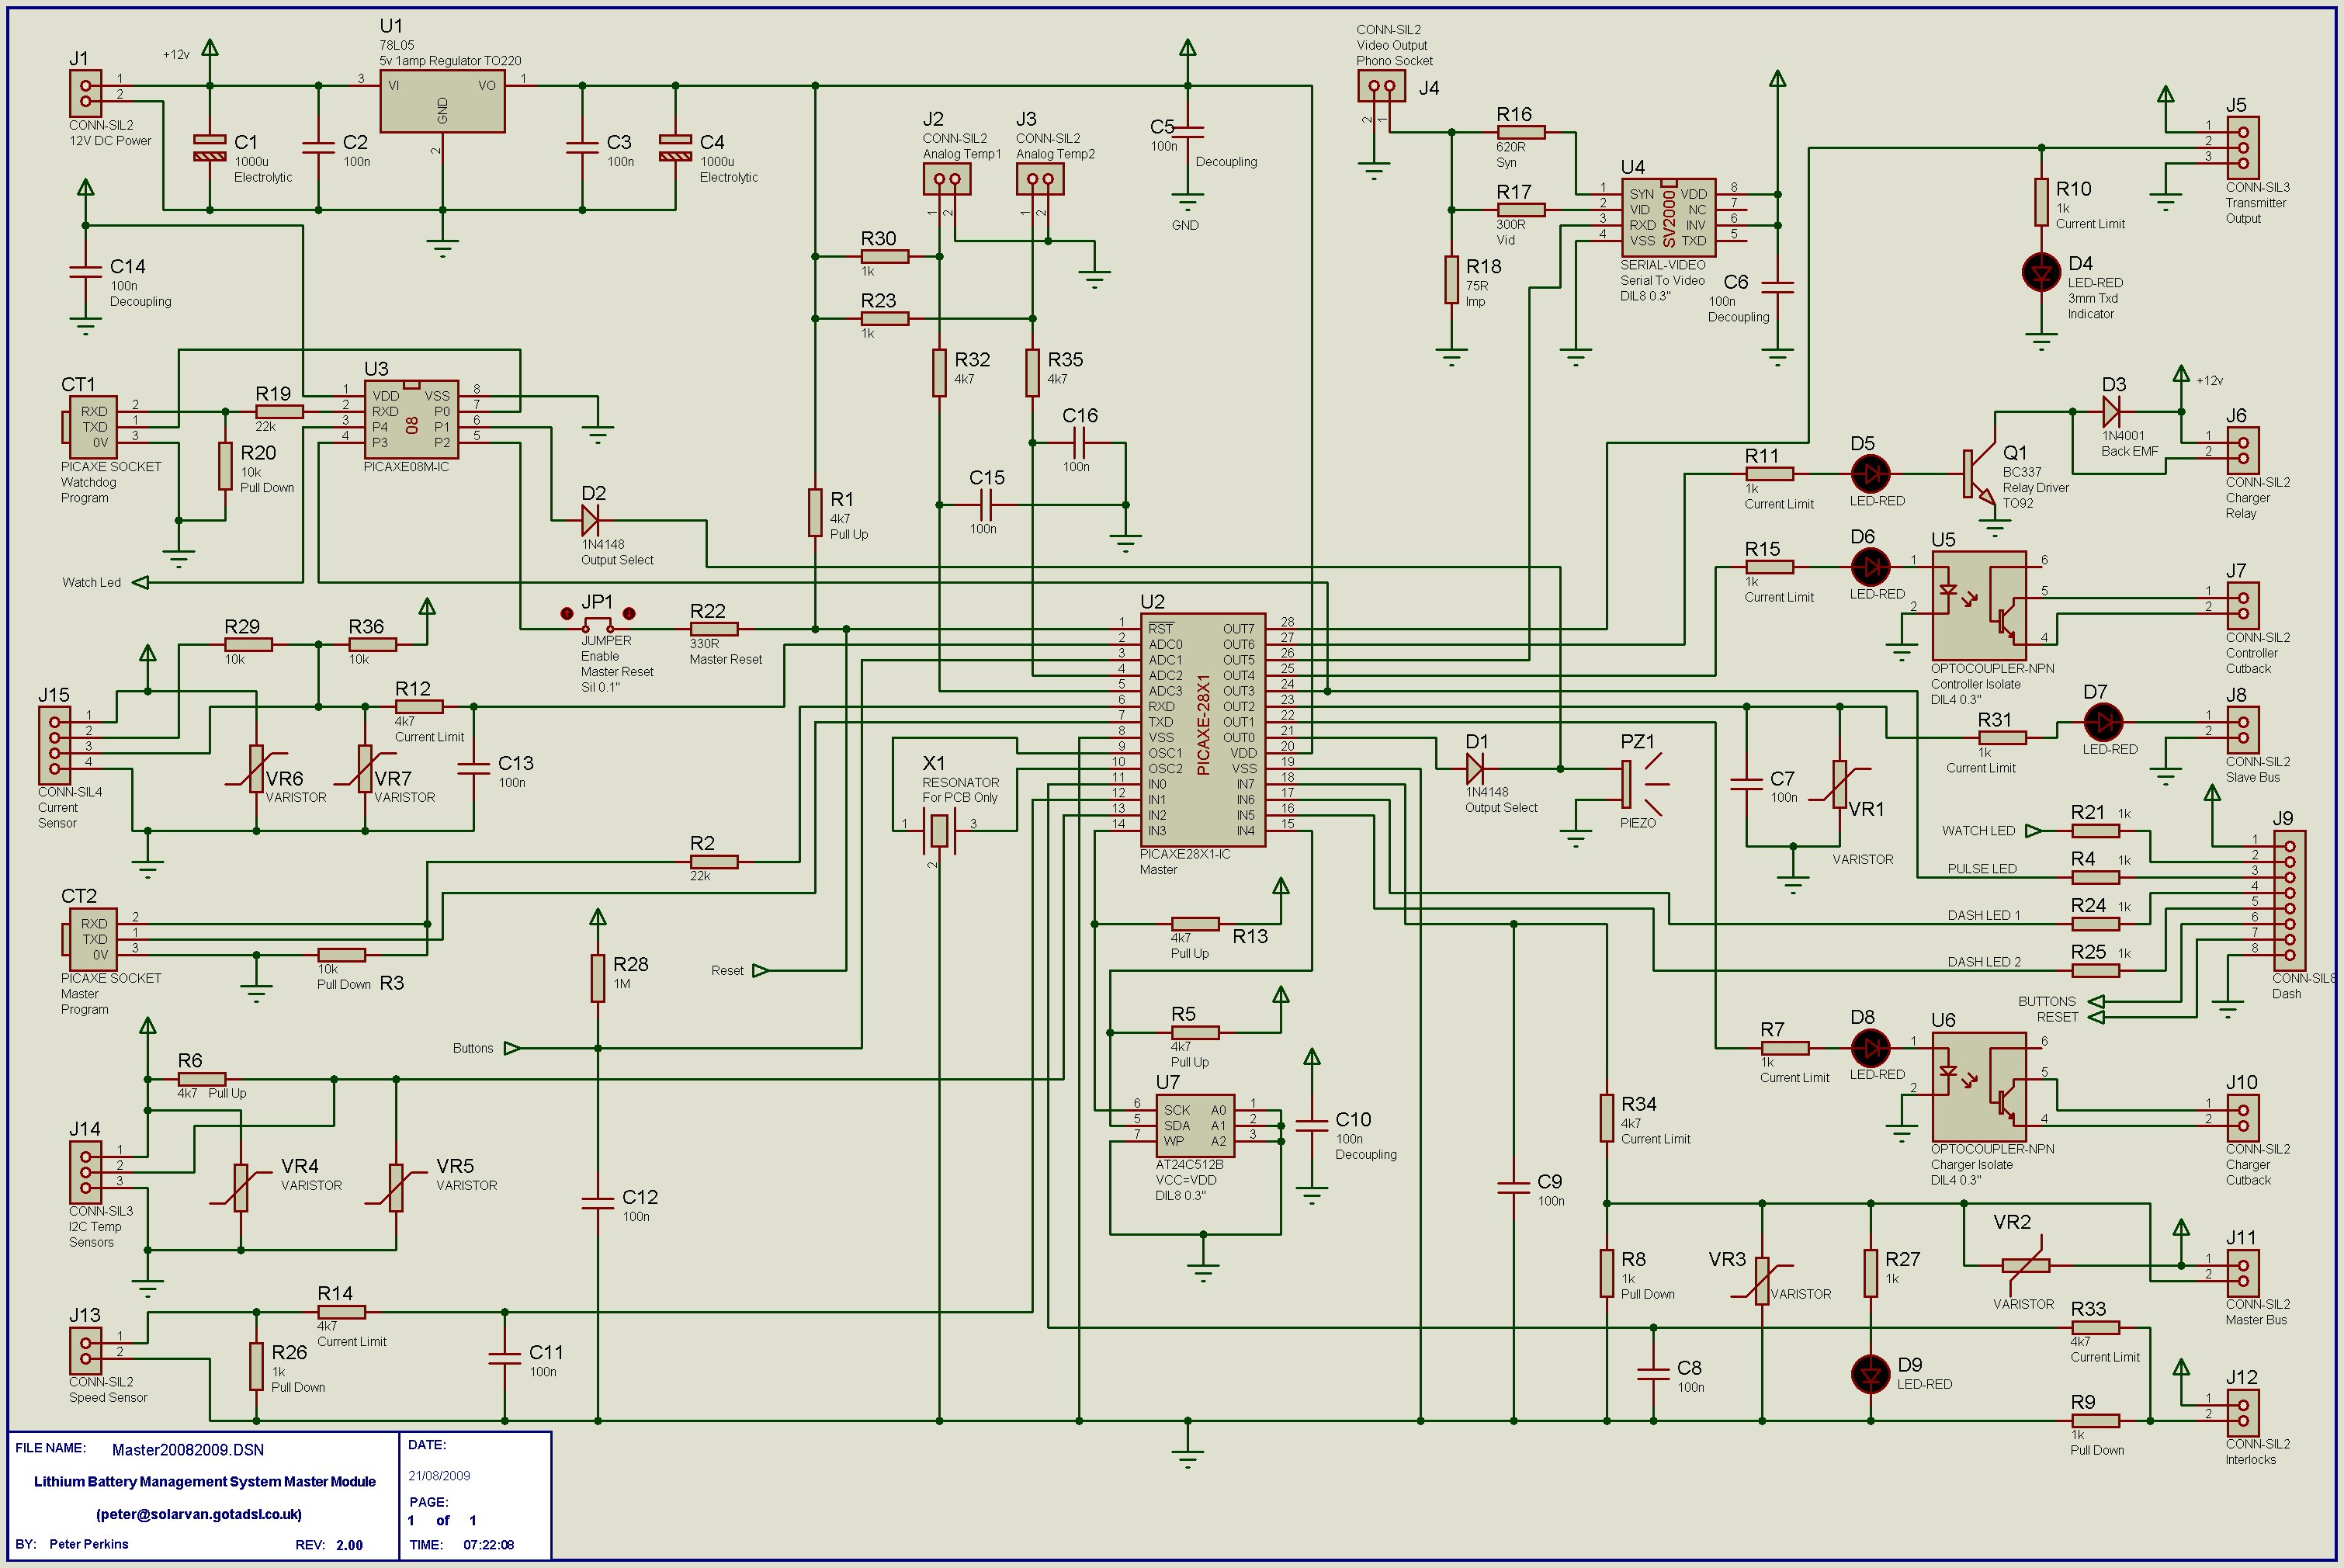
i'm looking at this schematic:
http://www.solarvan.co.uk/bms/Master20082009.jpgand not completely sure what the function of R29 and R36 is. this current sensor only has three wires, instead of the 4 that are on the master board. it looks to me like R29 and R36 can both be eliminated, or pin 2 should be tied to pin 4 in order to keep from biasing the input signal.
We are going to use the "COUNT" function to count number of pulses that occur during a time period, which we will probably set to 250ms. we are planning to use a function generator to simulate an input signal until our working speed sensor arrives
